

Hey there! As a copper pipe supplier, I've seen a lot of folks scratching their heads when it comes to installing copper pipes in a bathroom. It might seem like a daunting task, but with the right know - how and the right products, you can get it done like a pro. In this blog, I'll walk you through the step - by - step process of installing copper pipes in your bathroom.
Step 1: Planning and Preparation
Before you even think about picking up a tool, you need to plan your pipe layout. Take a good look at your bathroom. Figure out where the water source is, where the fixtures like the sink, toilet, and shower will be placed. You'll want to map out the shortest and most efficient routes for the pipes. This will save you a ton of material and make the installation process much smoother.
Measure twice, cut once! Use a tape measure to accurately measure the lengths of the pipes you'll need. Make sure to account for any bends, elbows, and connections. It's always a good idea to add a little extra length to each pipe, just in case.


Step 2: Gathering Materials
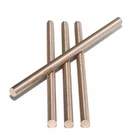
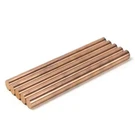
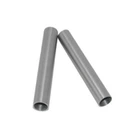
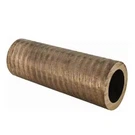
As a copper pipe supplier, I can tell you that having the right materials is crucial. You'll need copper pipes, of course. We offer a variety of copper pipes, such as Red Copper Pipe, Straight Threaded Copper Pipe, and Aluminum Bronze Pipe. Each type has its own unique properties and is suitable for different applications.
In addition to the pipes, you'll need fittings like elbows, tees, and couplings. These are used to connect the pipes at different angles and junctions. You'll also need flux, which helps the solder flow evenly when you're joining the pipes. And don't forget the solder itself. Make sure to choose a high - quality solder that's suitable for copper pipes.
You'll also need some tools. A pipe cutter is essential for cutting the copper pipes cleanly and accurately. A deburring tool will help you smooth out the edges of the cut pipes. A propane torch is used to heat the pipes and melt the solder. And a wire brush will come in handy for cleaning the pipes and fittings before soldering.
Step 3: Cutting the Pipes
Once you've got all your materials and tools ready, it's time to start cutting the pipes. Mark the pipes at the correct lengths using a marker or a piece of tape. Then, use a pipe cutter to make the cuts. Place the pipe cutter around the pipe at the marked point and tighten the cutter until the blade bites into the pipe. Rotate the cutter around the pipe, tightening it a little more with each rotation, until the pipe is cut through.
After cutting the pipe, use a deburring tool to remove any burrs or rough edges from the inside and outside of the pipe. This will ensure a good fit when you're joining the pipes.
Step 4: Cleaning and Fluxing
Cleanliness is key when it comes to soldering copper pipes. Use a wire brush to clean the ends of the pipes and the inside of the fittings. This will remove any dirt, grease, or oxidation that could prevent the solder from bonding properly.
Once the pipes and fittings are clean, apply flux to the ends of the pipes and the inside of the fittings. Flux acts as a cleaning agent and helps the solder flow smoothly. Make sure to apply a thin, even layer of flux.
Step 5: Joining the Pipes
Now it's time to join the pipes. Insert the end of one pipe into the fitting until it reaches the stop. Make sure the joint is tight and there are no gaps.
Hold the propane torch at an angle and heat the joint evenly. Move the torch around the joint in a circular motion to ensure that the heat is distributed evenly. As the joint heats up, the flux will start to bubble. When the flux turns a light brown color, it's time to apply the solder.
Touch the end of the solder to the joint. The heat from the pipe will melt the solder, and it will be drawn into the joint by capillary action. Keep applying the solder until the joint is filled. Be careful not to over - solder, as this can cause blockages in the pipes.
Once the joint is filled with solder, remove the torch and let the joint cool. Do not move or disturb the joint while it's cooling, as this can cause the solder to crack.
Step 6: Installing the Pipes
After you've joined all the pipes and fittings, it's time to install them in the bathroom. Start by attaching the pipes to the water source. Use a wrench to tighten the connections securely.
Next, position the pipes in the planned layout. You may need to use pipe hangers or straps to support the pipes and keep them in place. Make sure the pipes are level and straight.
Connect the pipes to the fixtures like the sink, toilet, and shower. Use the appropriate fittings and make sure the connections are tight.
Step 7: Testing the System
Once you've installed all the pipes, it's time to test the system. Turn on the water supply and check for any leaks. Look for drips or puddles around the joints and connections. If you find a leak, turn off the water supply and re - heat the joint and add more solder if necessary.
Let the water run for a few minutes to make sure the system is working properly. Check the water pressure and the flow rate at each fixture.
Step 8: Finishing Touches
After the system has been tested and there are no leaks, you can add the finishing touches. You can paint the pipes to match the decor of your bathroom or cover them with insulation to prevent heat loss.
And that's it! You've successfully installed copper pipes in your bathroom. It might take a little time and practice, but with the right materials and tools, you can do it yourself.
If you're interested in purchasing copper pipes for your bathroom project or have any questions about the installation process, feel free to reach out. We're here to help you every step of the way. Whether you need Red Copper Pipe, Straight Threaded Copper Pipe, or Aluminum Bronze Pipe, we've got you covered. Contact us for more information and let's start your project together!
References
- "Plumbing for Dummies" by Richard Trethewey and Roy Barnhart
- Various industry standards and guidelines for copper pipe installation